Get Crimping
Apr 26, 2020The last couple of issues of Practical Wireless have covered soldering connectors onto coax cables. This is something that I find pretty easy, but depending on the type of connectors you get it can be a proper pain to get right. In fact, I very quickly gave up on soldering connectors in favour of using a cheap crimp tool, and I’ve never looked back. Once you learn how to do it the results are repeatable, reliable and fairly quick. So, here’s my guide to crimping radio connectors.
First: what are we crimping? and what tools do we need?
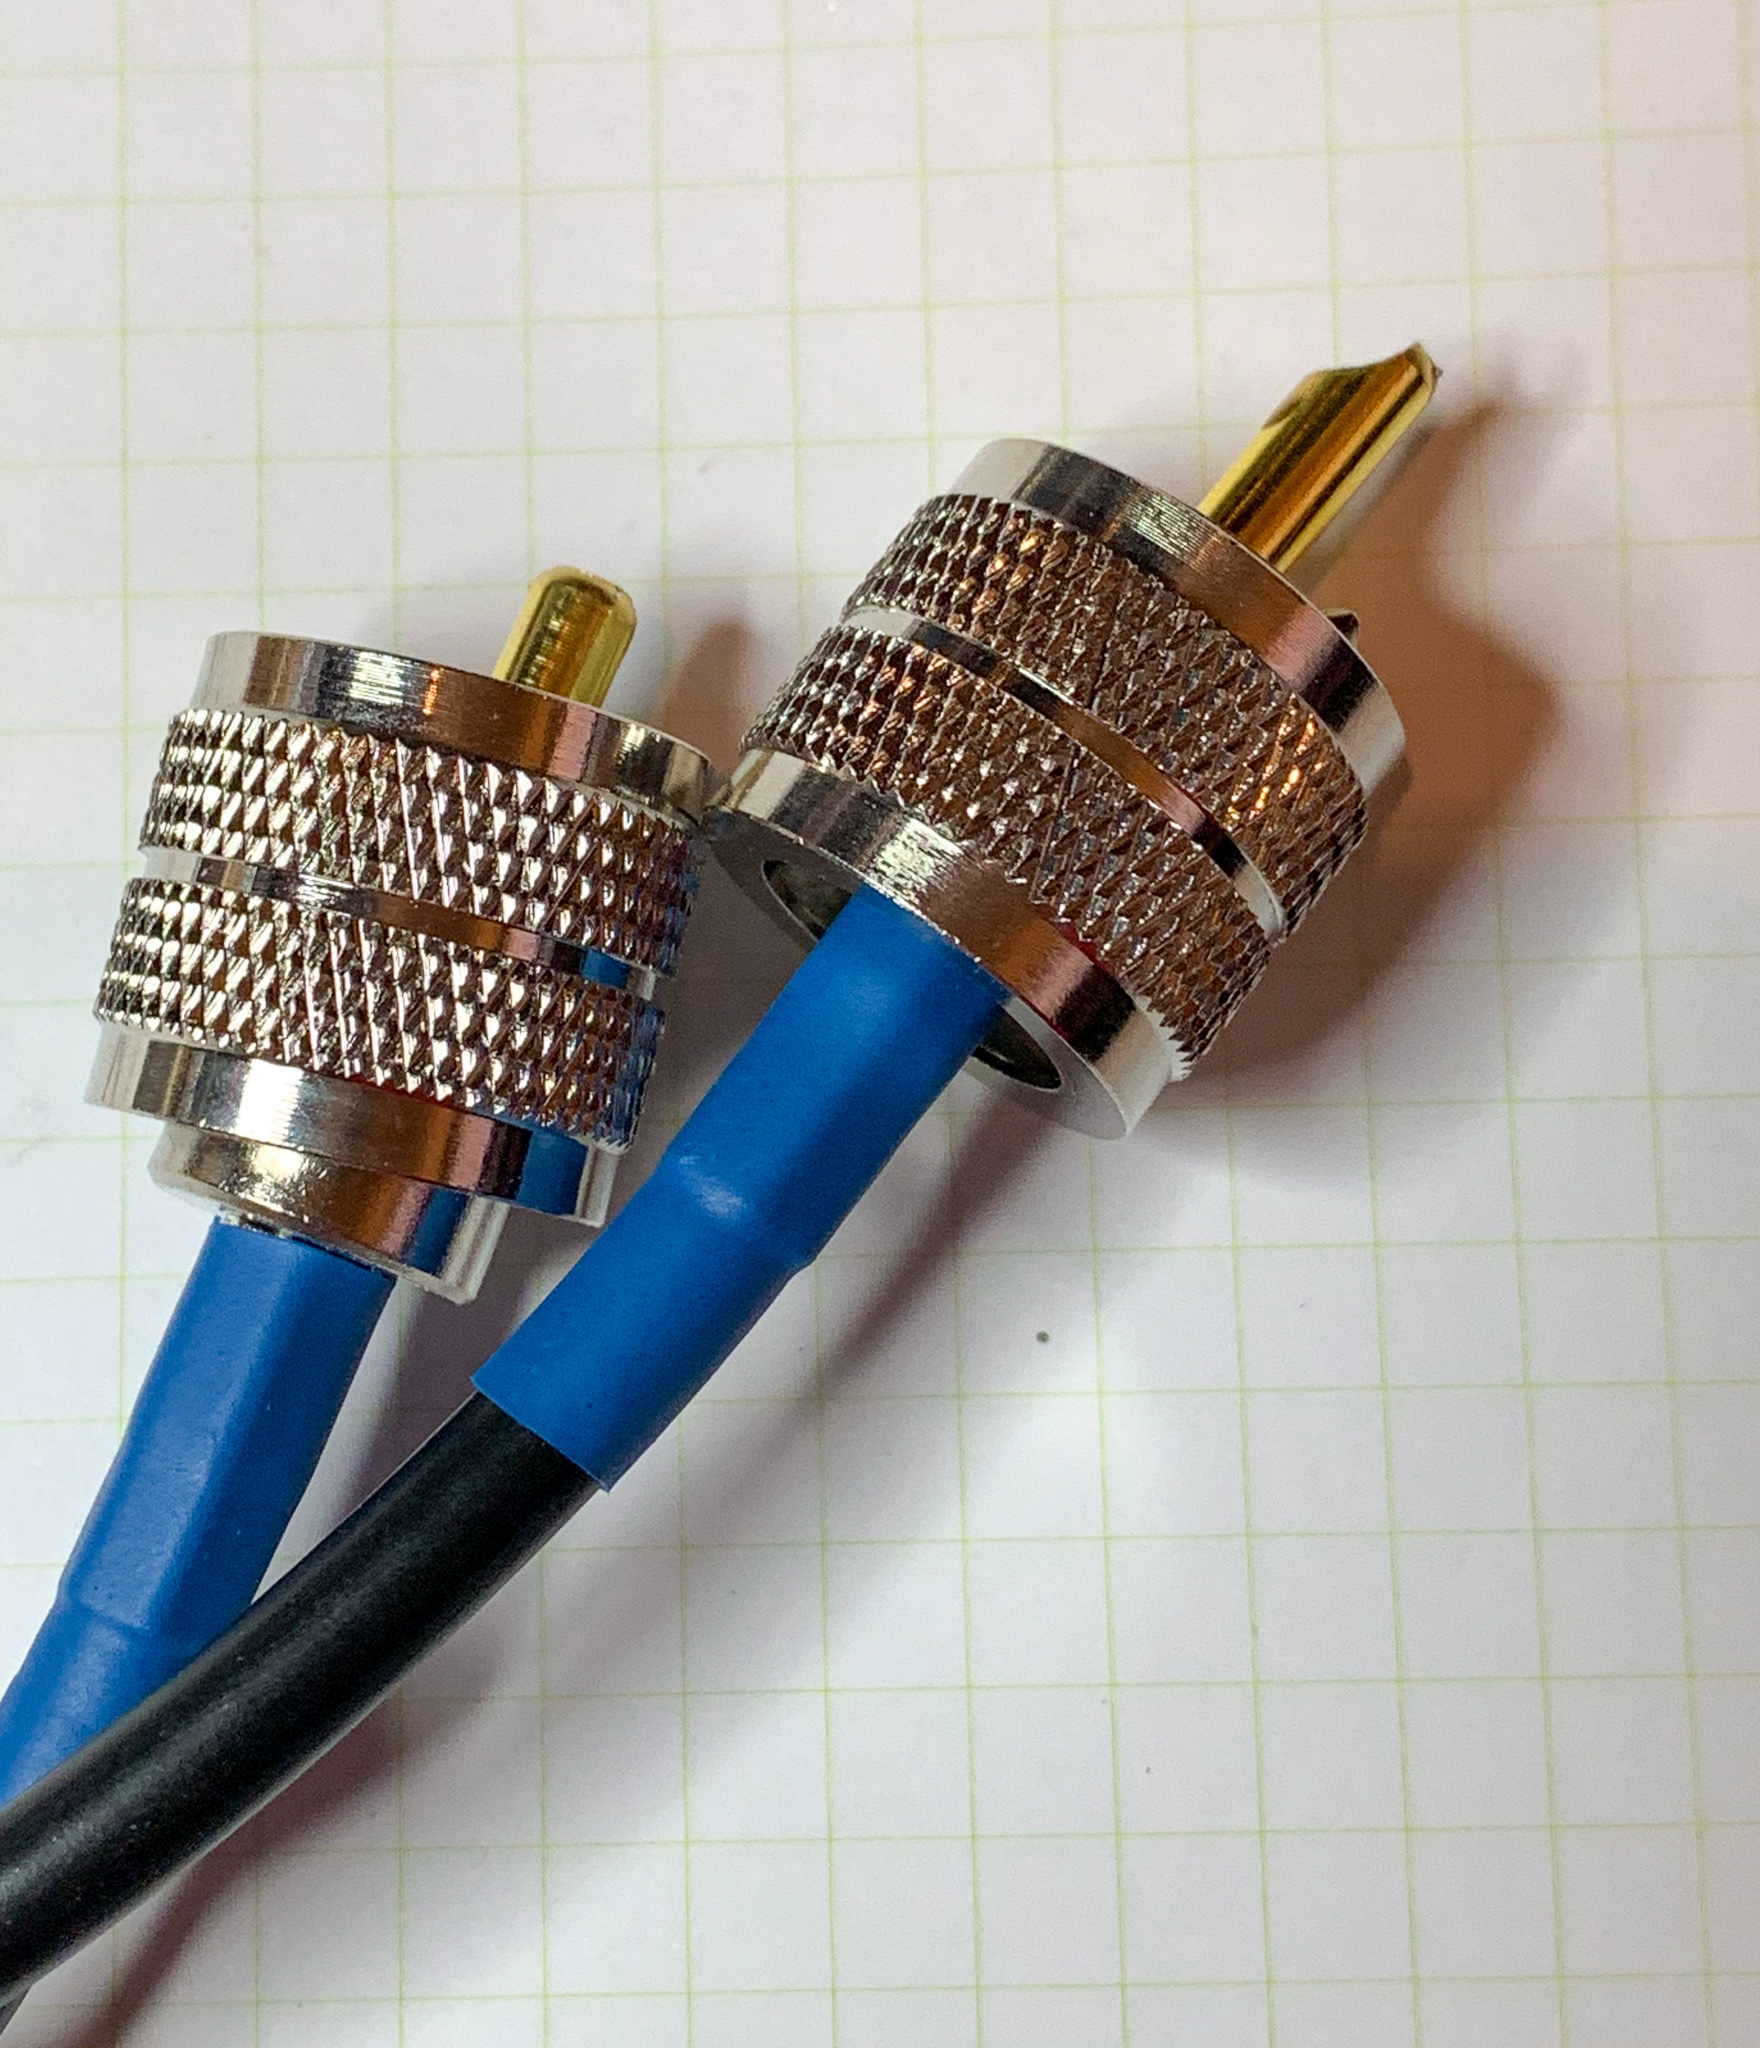
I’ll be crimping PL259 (aka UHF) plugs onto cheap RG58 coax. They came from eBay and were actually fairly expensive, but easily available when a lot of stuff on Amazon wasn’t. I’ll also finish the connectors with heat shrink tubing, to do this you need some tube that’s just large enough to side over the plug’s sleeve – I have a box of assorted sizes, which I recommend.
As a quick aside: these instructions are basically the same for most types of crimpable plug. If you buy nice expensive Amphenol connectors you can easily get datasheets which could make life even easier, and you might find that some connectors have pins you solder to the inner of the coax. Regardless, the process is more-or-less the same.
The tools I use are:
- Paper, pencil and ruler
- White pen
- Wire cutters
- Wire strippers for both the outside of the coax, and the centre
- Crimp tool
- Soldering iron
- Hot air gun
- Multimeter.
The hot air gun isn’t needed if you aren’t using heat shrink, and you could use a lighter instead.
Getting started
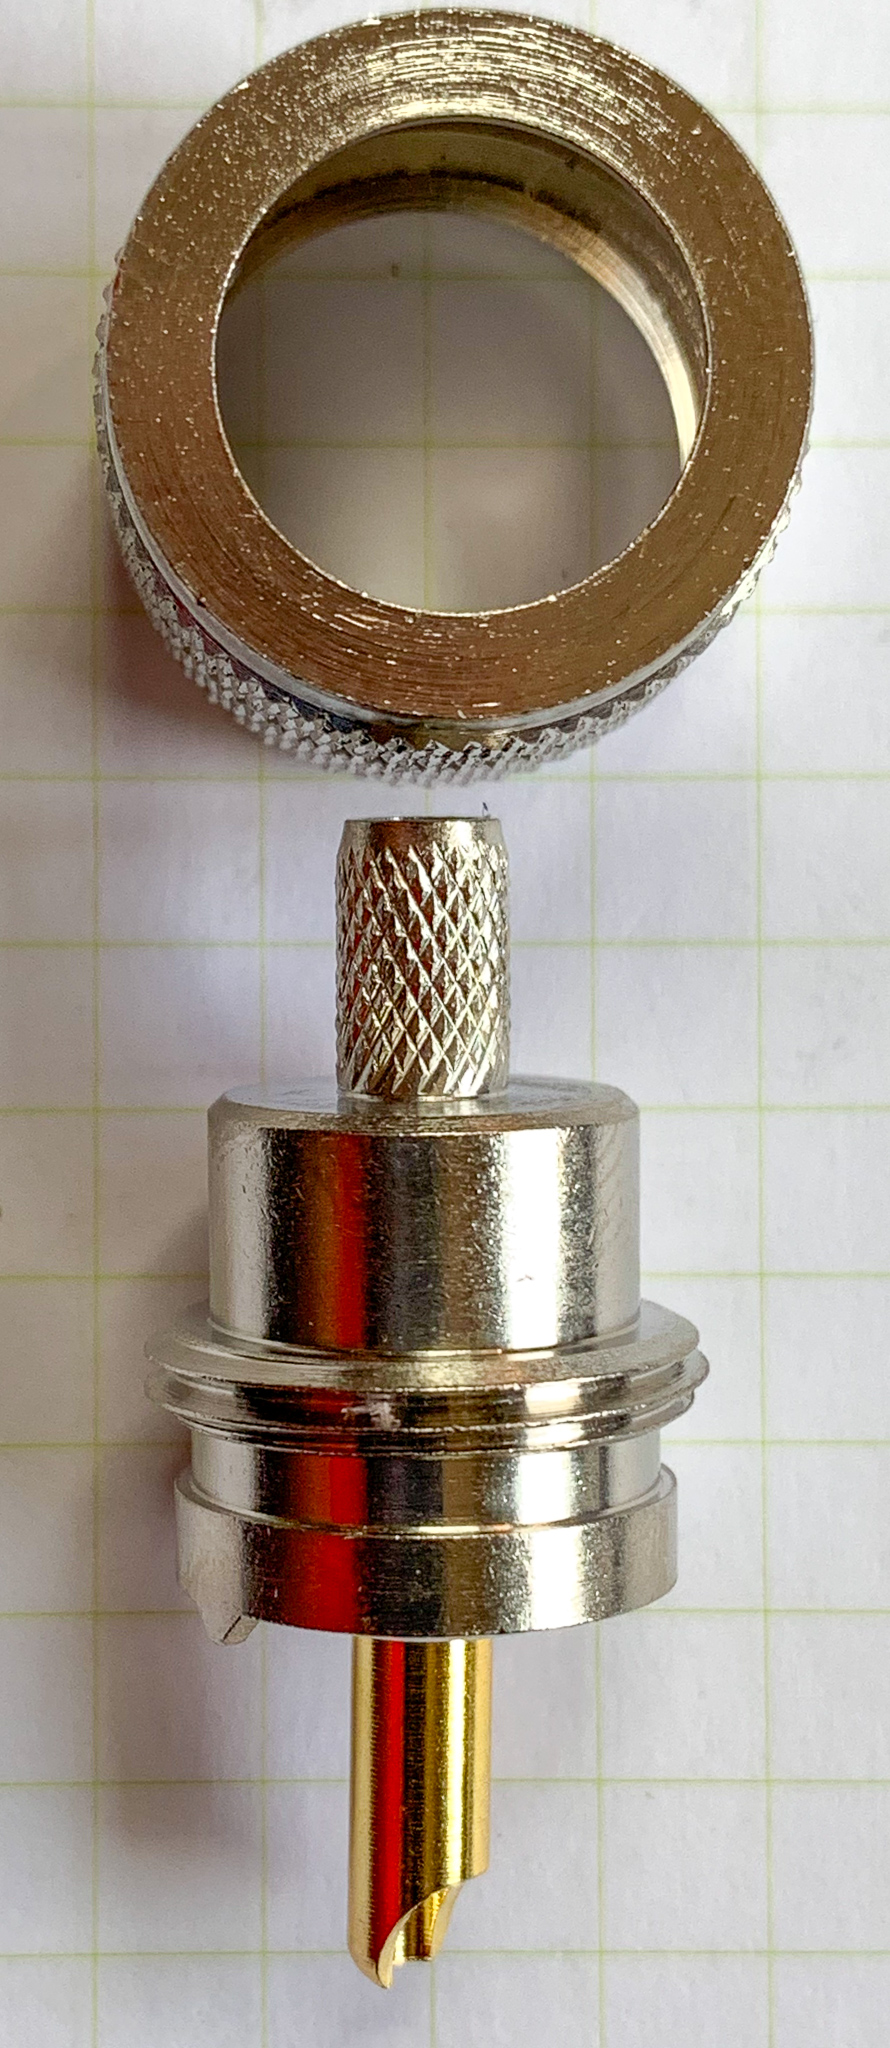
The first step in the process is measuring the plugs you are going to be crimping. To do this, I take the threaded part off one of the connectors and lay it on a piece of paper, then I mark the paper so I can see where to remove the sheath, braid and inner from the coax. You’ll end up with something like this, but specific to your plugs:
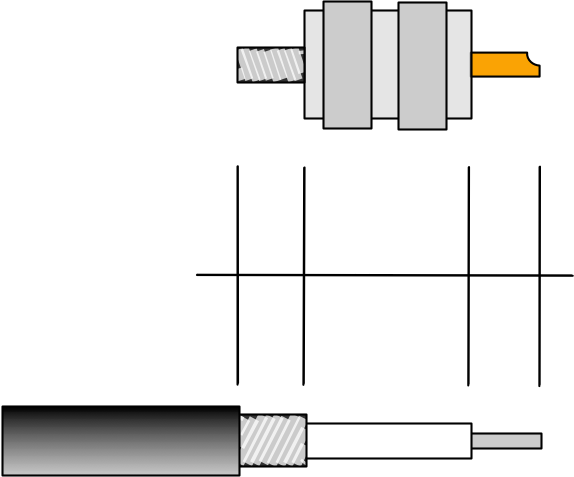
Keep this with the current batch of plugs, but be aware that different types of plug have different sizes so it might not be all that reusable!
Prepare the cable
Find the coax you intend to use and cut it to length. Next, find heat shrink tube, plugs and metal sleeves. Slide the heat shrink and sleeves onto the cable once it’s the right length – it’s easier to do this at the start than after you started stripping the cable.
Use your paper diagram and the white pen to mark the sheath at the point you need to strip it. Doing both ends of the cable can save you some time.
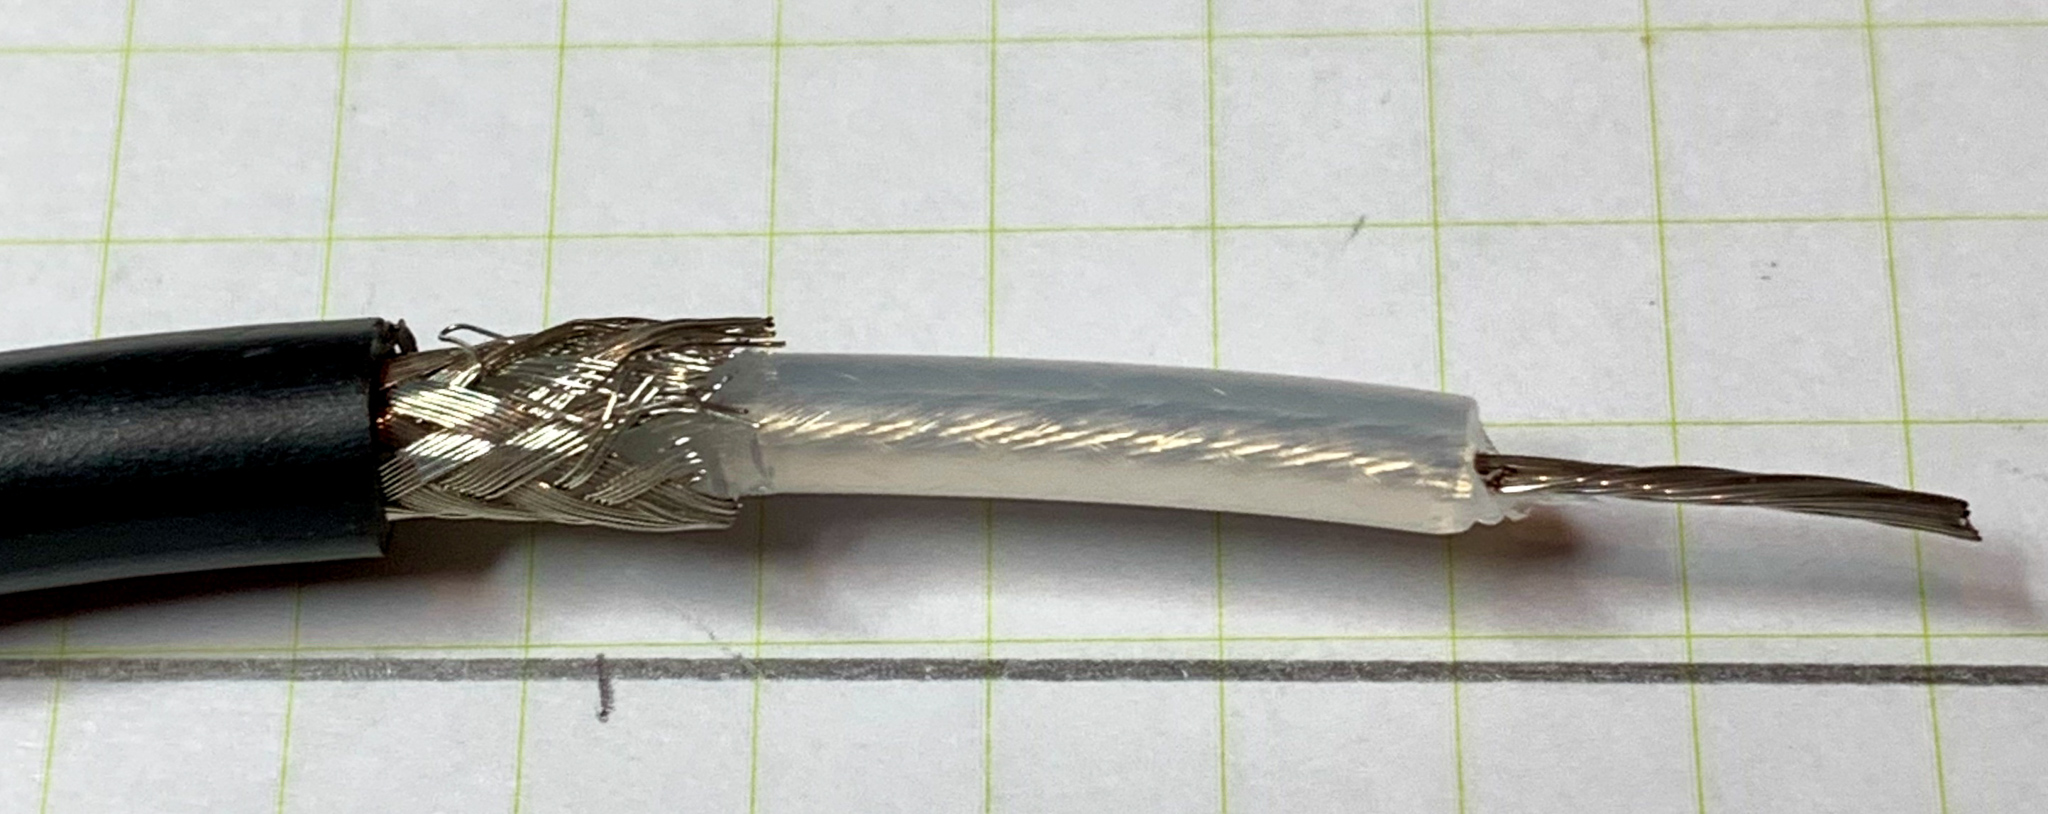
Strip the cable, being careful not to cut through the braid. You can use a sharp knife but a purpose-made wire stripper for coax is much easer to use.
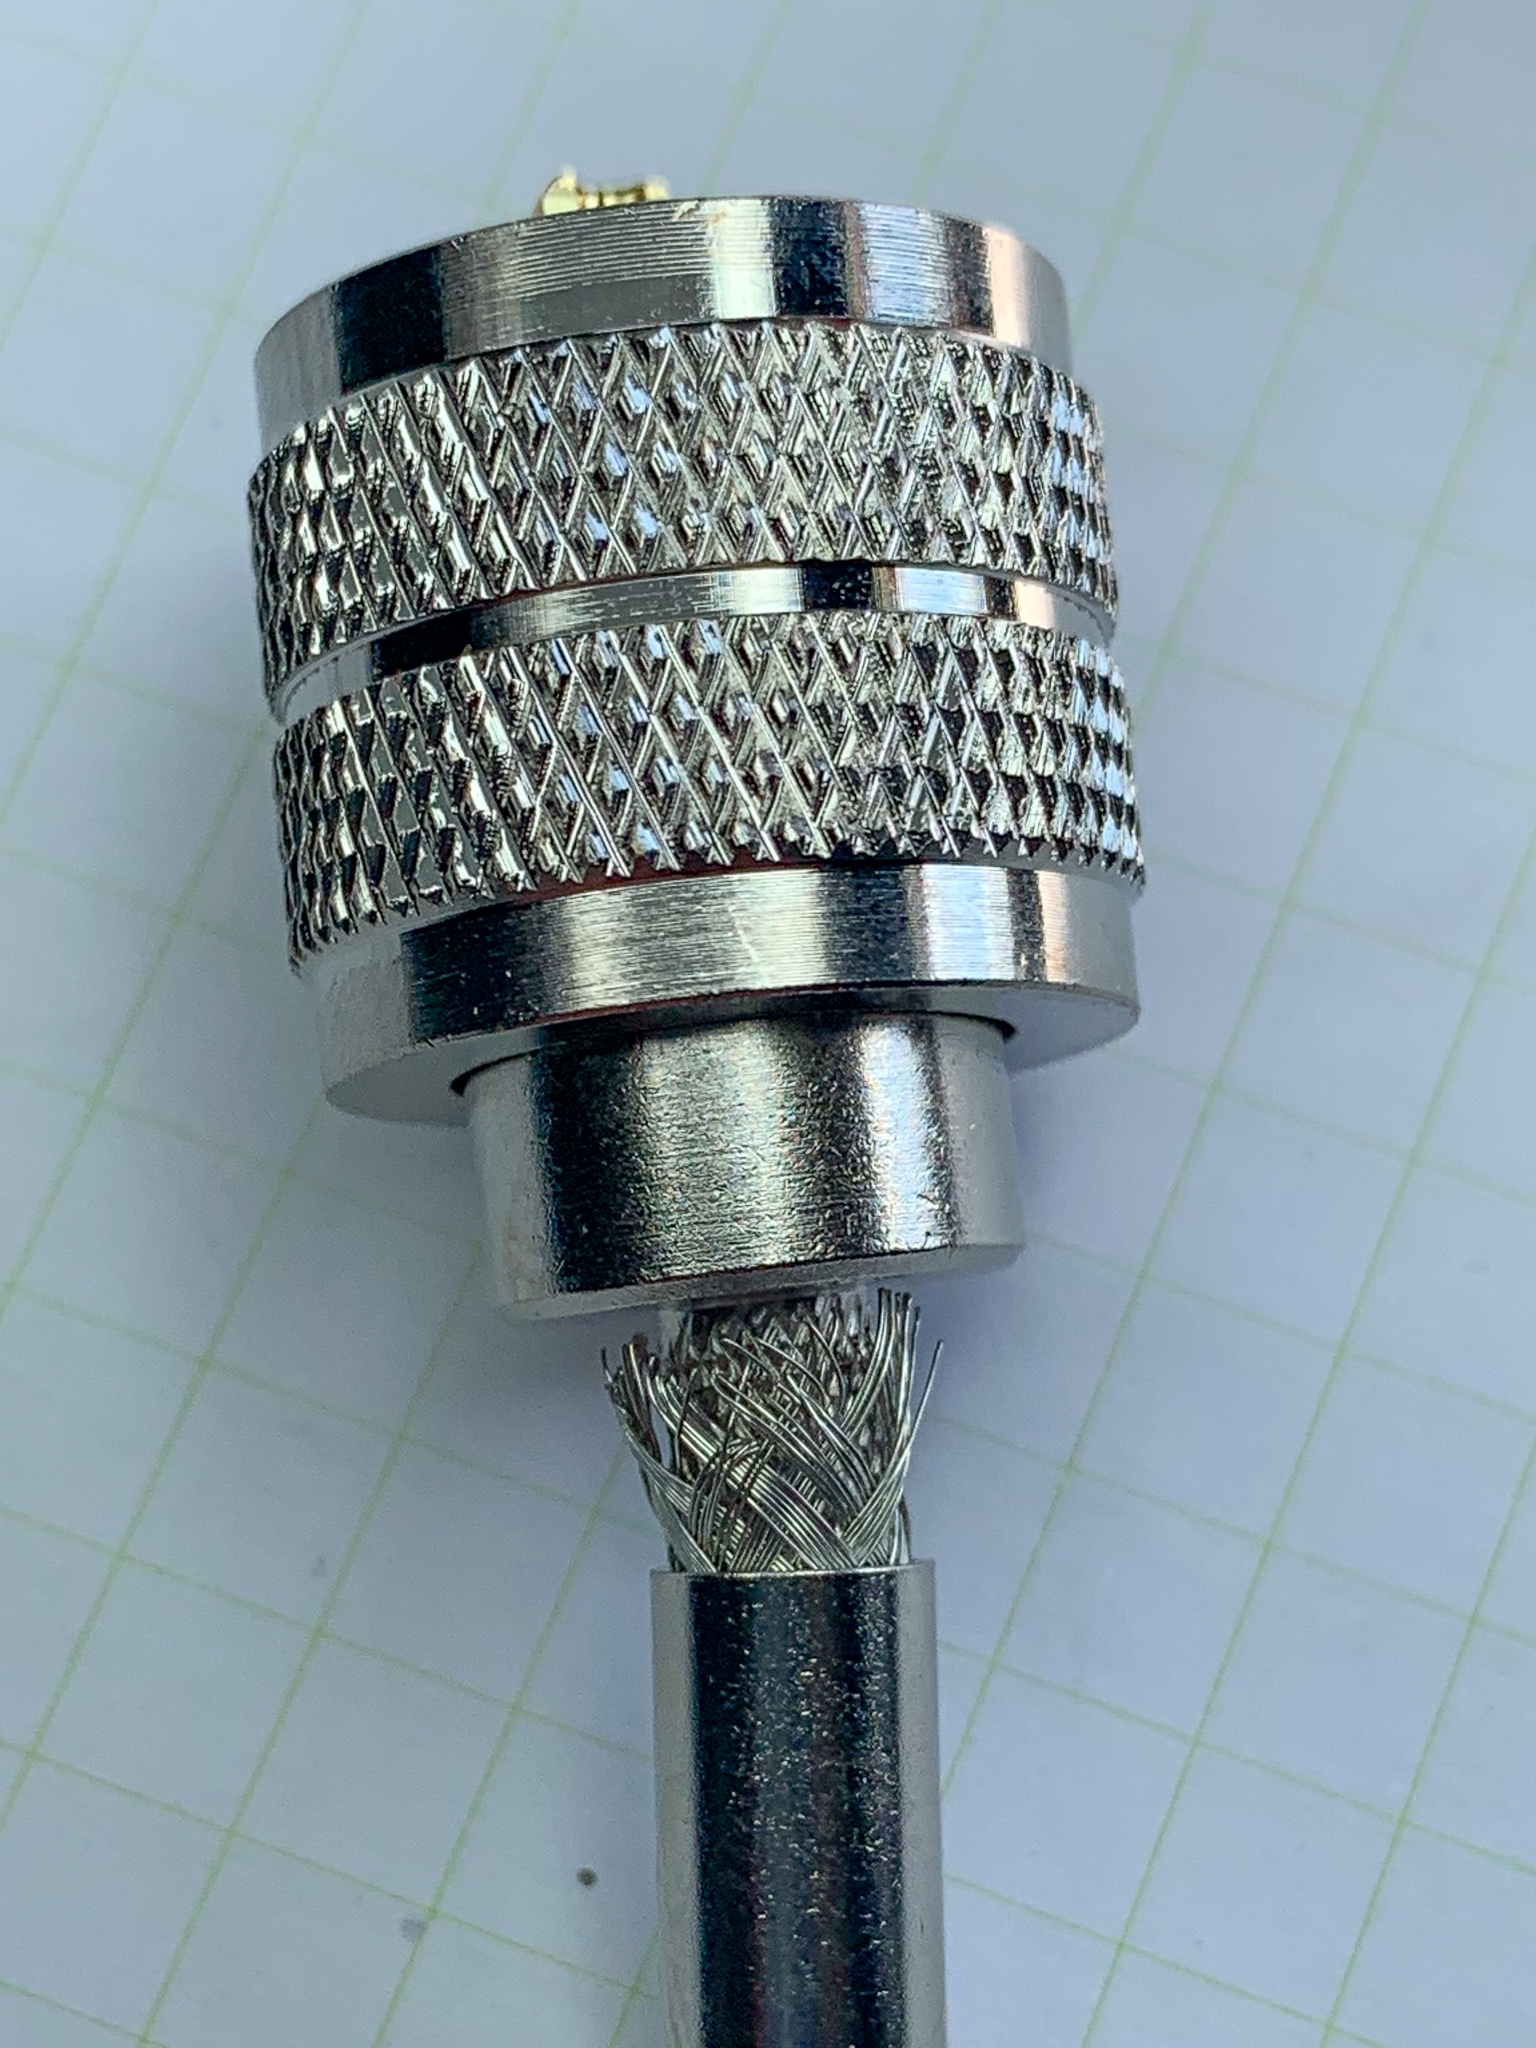
Now, depending on the sort of plugs you have you will either need to pull the braid back, or cut it at the second point on your diagram (closest to the still-sheaved cable). Whether you need to do this now depends on how tight the metal sleeves are. You might find that they slide easily over the braid and onto the bottom end of the plug, in which case you can trim the braid later, but most plugs I’ve had were too tight for that to work.
Finally, cut through the insulating centre to reveal the centre conductor. Do this at the penultimate point on your diagram so you have about the same amount of conductor exposed as the length of the brass end of the plug. Then twist the conductor’s strands clockwise (use your right hand if you’re a lefty, as it’s easier). I’ve found it’s best to twist clockwise as going anti-clockwise often loosens the twists further down the cable.
Your cable will now look like the bottom section of the diagram above, ready to slide into the plug for crimping.
Crimp!
Side the sleeve up to the base of the plug and over the braid. The sleeve will sandwich the braid between itself and the bit that sicks out from the bottom of the plug. This could be a tight fit, so you might need to use something to push the sleeve downwards. Lots of sleeves have a vertical slit, so don’t use pliers around the sleeve or you might stop it expanding.
Once the sleeve is in place you’re basically ready to crimp, but before you do, check for shorts. A multimeter on a continuity checking mode should not see a short between the body of the plug and the centre conductor. If it does, dismantle the plug and check no strands of the centre conductor have pushed into the body.
When you’re happy everything is sound, use your crimp tool to squeeze the sleeve into place. You should pick a setting which leaves the sleeve hexagonal, or it may slip off the cable.
Finish up
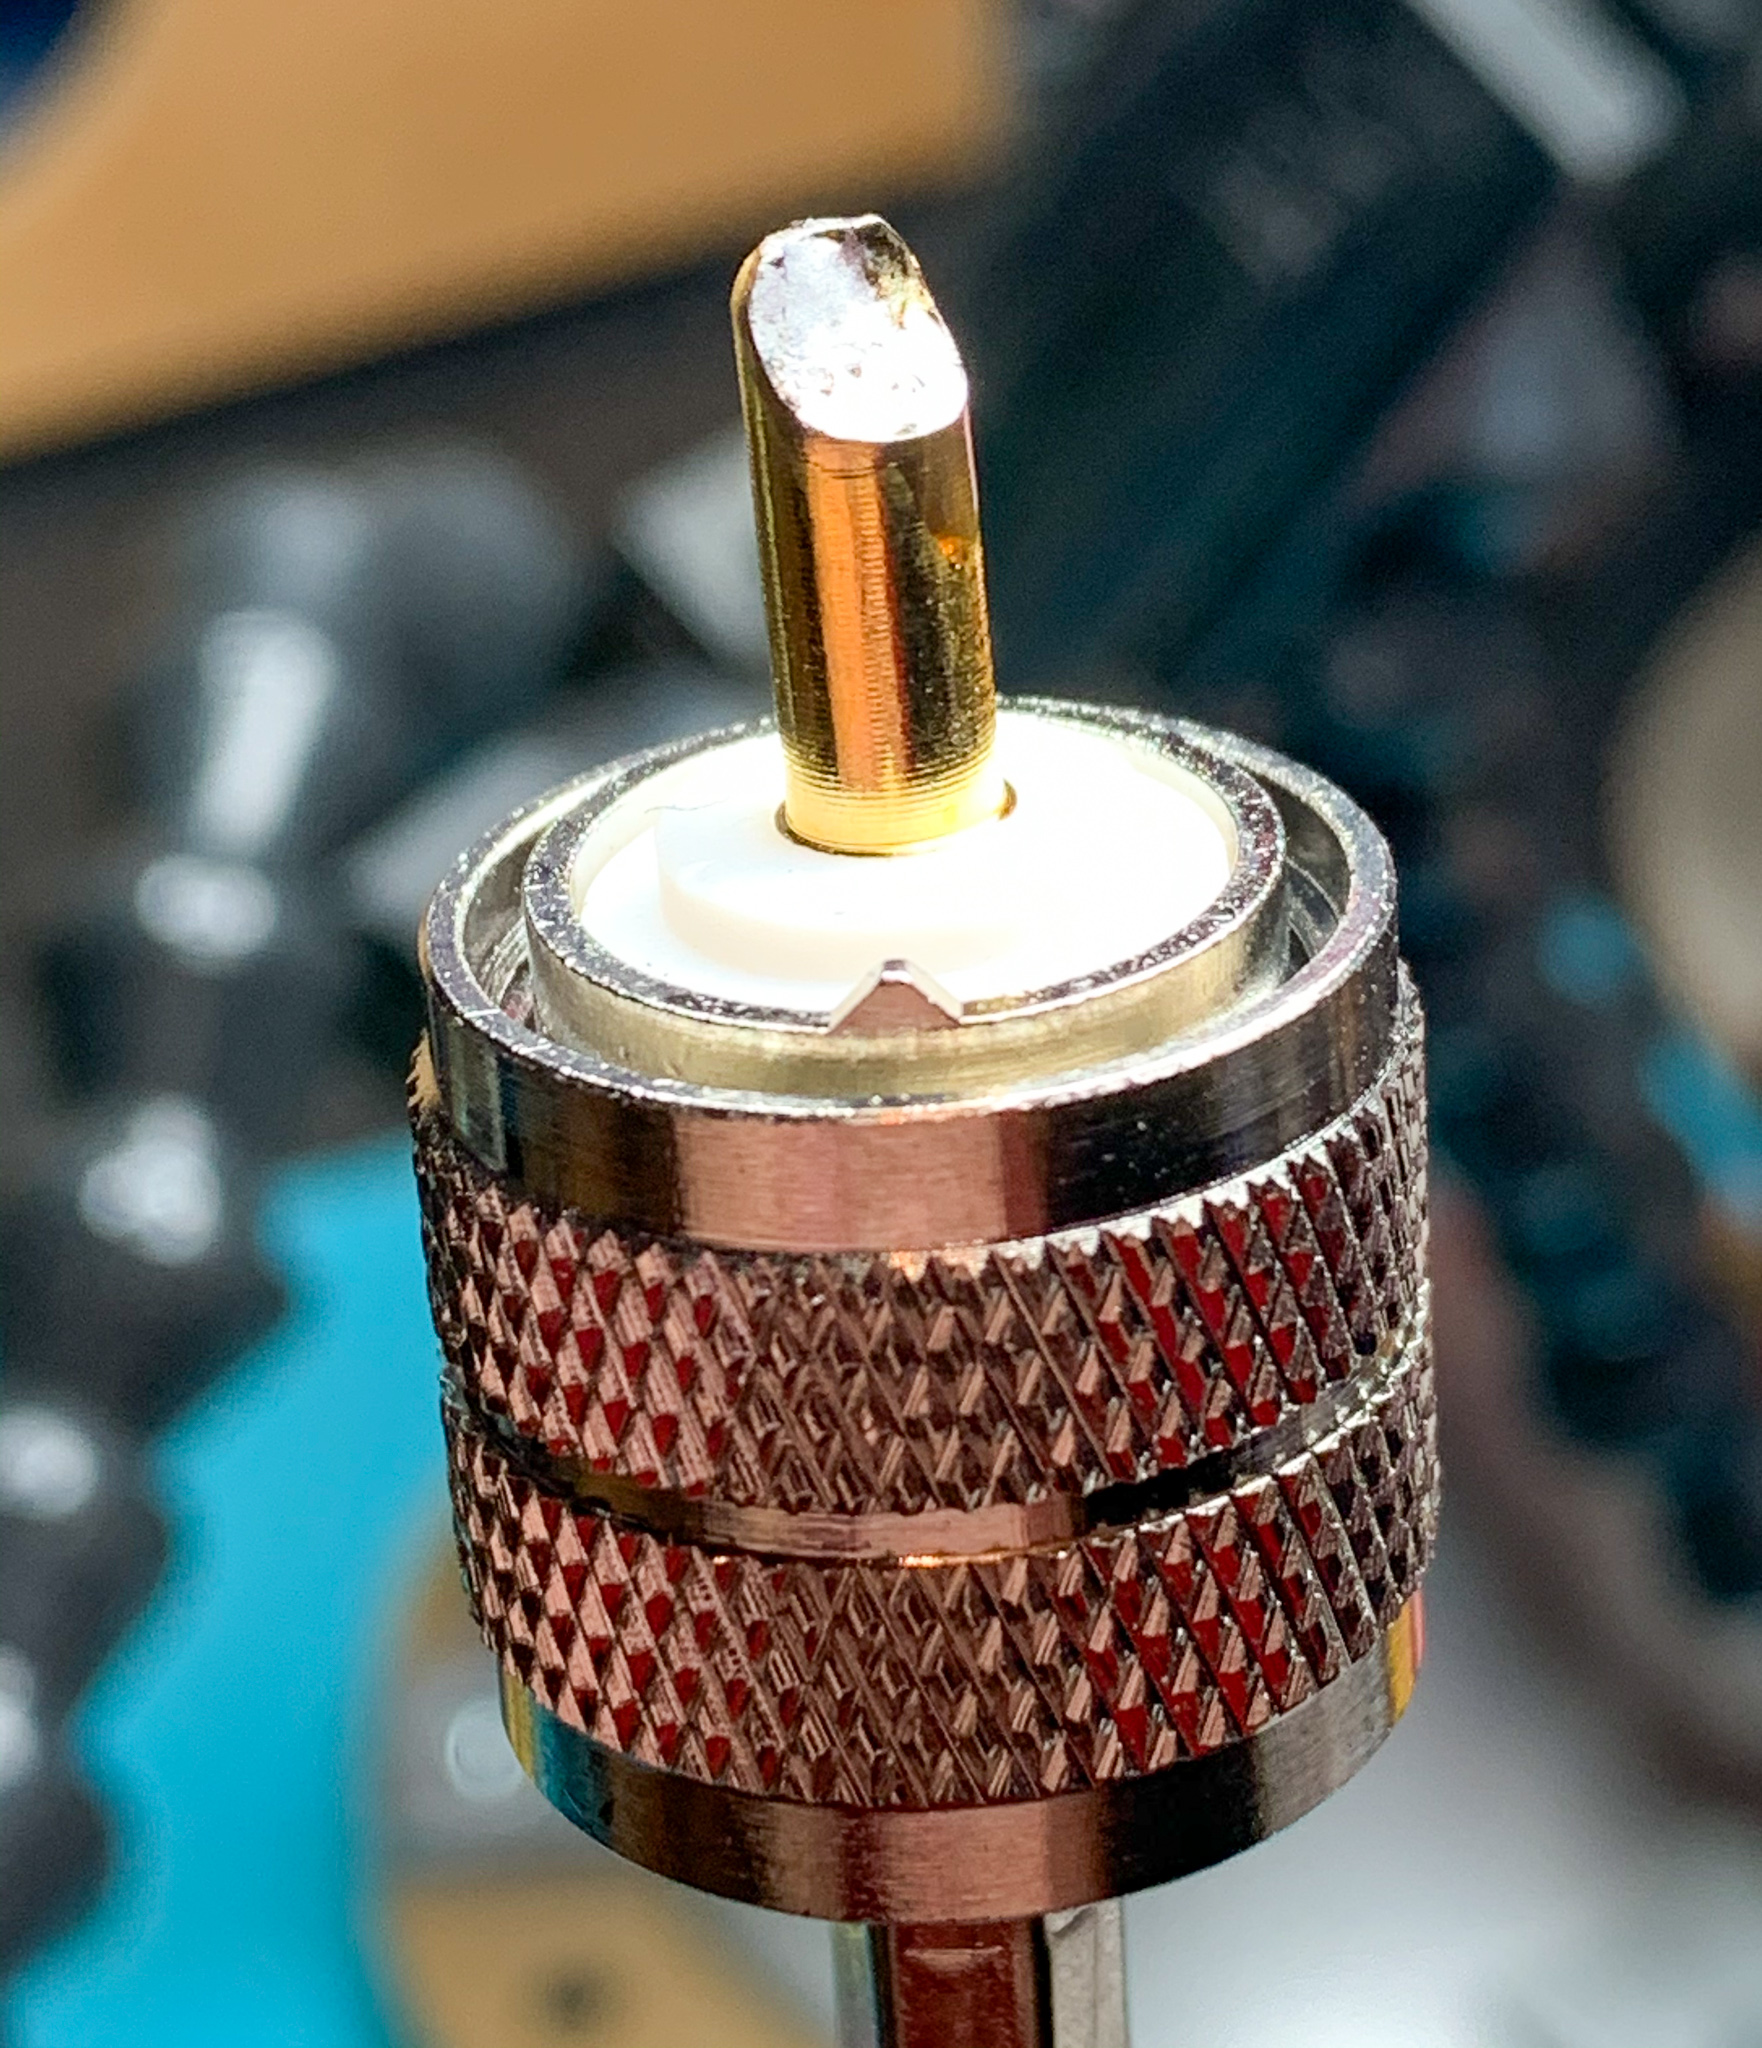
Now you’re basically done. The next two steps are to solder the centre conductor into the brass pin and then heat shrink the sleeve.
To solder the conductor first trim any excess wires so they’re flush with the scooped section and then heat the pin. Apply solder so it flows into the centre, but don’t push too much in there or it will flow into the body and could cause problems. However, unlike some lesser (non-crimp!) plugs there should be no braid in the middle of the plug so you’re much less likely to cause a short.
Shrink down the heat shrink tube, making sure it stays up against the base of the sleeve to keep everything tidy, and then once done do some continuity checks with the meter again. You want no shorts and good conductivity on both the braid and centre conductors, especially after and during wiggling the cable around.
Congratulations! You’re done!