An IoT thermometer with ESP8266 and MQTT
Feb 21, 2016I bought a couple of cheap NodeMCU dev boards from aliexpress and decided to write turn them into simple remote thermometers. This post chronicles what I did, and how I did it. I won’t describe my MQTT setup too much, as I think that’s another post, and like most IoT manufacturers I’ve totally ignored security here!
I’m hoping that a couple of these devices will let me make an intelligent wireless thermostat system with multiple room thermometers.
Basic setup
To start with, I had little idea about the firmware running on my ESP8266s, so I created a custom build. This is a cool service, recommended on the nodemcu-firmware github README. I configured my firmware to have a few extra modules, like MQTT and I2C, which I knew I’d need. Then, the build service was super-fast, so within a few minutes I had downloads of floating point and integer firmwares. I knew I’d need the floating point version for temperature measurements.
Next, I grabbed esptool, and flashed one of the devices with:
% sudo ./esptool.py write_flash 0x00000 nodemcu-master-10-modules
Note: I did this using a disposable VM, so I didn’t bother setting up udev to give me access to the serial port without using sudo. For long term use that’s probably worth doing.
Next, I ran sudo screen /dev/ttyUSB0, hit the reset button and saw:
NodeMCU custom build by frightanic.com
        branch: master
        commit: c8037568571edb5c568c2f8231e4f8ce0683b883
        SSL: true
        modules: bit,file,gpio,i2c,mqtt,net,node,tmr,uart,wifi
 build  built on: 2016-02-10 19:29
 powered by Lua 5.1.4 on SDK 1.4.0
Awesome! This is a Lua shell, so you can enter things, like:
> print("hello world")
And to check you have working floating point arithmetic:
> a=1.1
> b=2.2
> print(a+b)
3.3
Taking readings and uploading code
I have a couple of TMP102 (datasheet) breakout boards left over from a previous project, so decided that would be a good place to start in the creation of my thermometer. These things are tiny, reasonably accurate and have a very low current draw. They also operate at 3.3V, which is the voltage the NodeMCU expects. So, I put my NodeMCU on a breadboard, and wired up the TMP102.
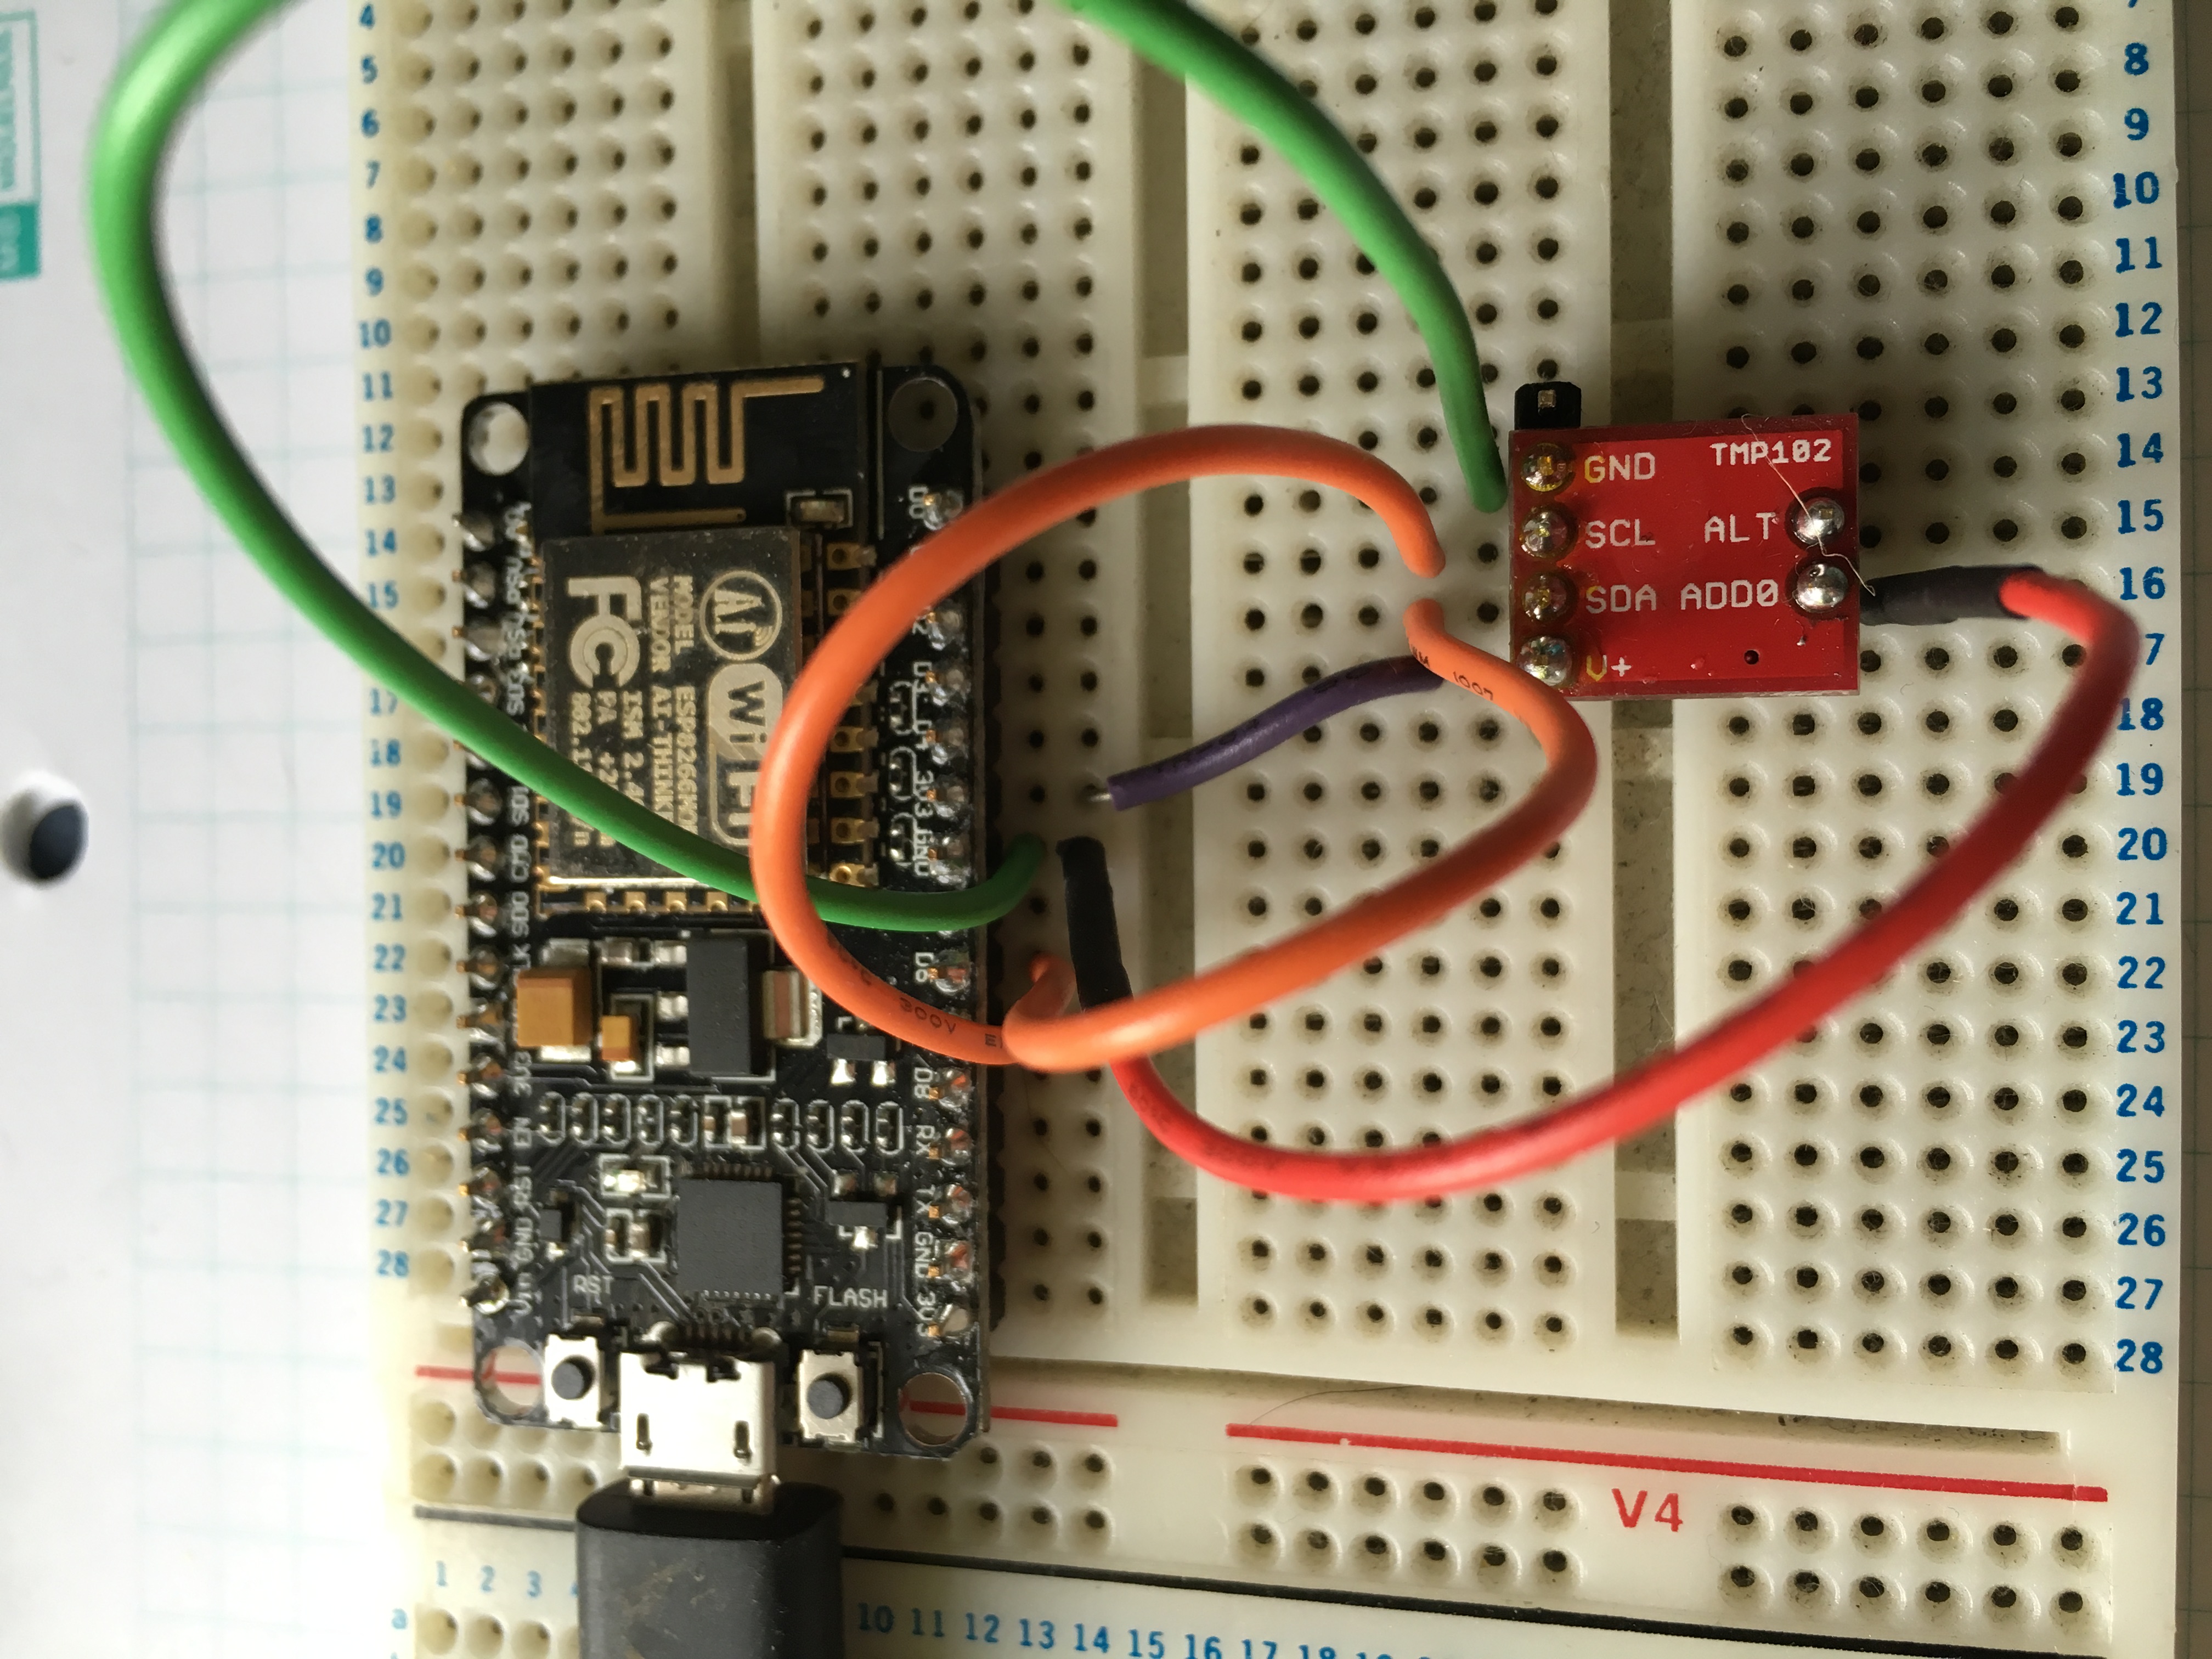
Initially, I decided to attempt to read my TMP102, using someone else’s
pre-written
code. I also
followed their wiring recommendations by connecting SDA to D6 and SCL to
D7.
My next step was to grab luatool and attempt to upload the file to the chip. Unfortunately, the serial connection didn’t seem to be all that stable, so I kept seeing things like this:
ERROR
 send string    : 'file.open("main.lua", "w")'
 expected echo  : 'file.open("main.lua", "w")'
 but got answer : 'p2qtdrrf l	l:6199oeL5 S.'
I tried lots of things to make this work, including flashing alternative
integer based firmwares, and trying external PSUs, but in the end I just messed
about a lot and found that running luatool about half a second after
resetting the device seems to work reliably. So I ended up with the code on
the chip. Later on, I found that just running luatool worked reliably, so I’m
unsure what changed!
Then to test I had everything wired and uploaded correctly, I ran mrasband’s example code, and saw:
> tmp102 = dofile("tmp102.lua")
> tmp102.begin(0, 6, 7) -- id, sda, scl
> print("Temperature Reading from TMP102: "..tmp102.celcius())
Temperature Reading from TMP102: 23.5625
Which means it works!
One thing I’ve noticed with these little devices before is that they seem to measure a little hotter than other thermometers, so I suspect something is missing, but it’s close enough to call success for now! Another thing I’ve noticed is that most code doesn’t take account of the fact that the sensors can read values below zero, using two compliment arithmetic, but I’ll update the script if I end up needing to measure external temperatures.
Connecting and sending readings
Once I had basic temperature readings, I wanted to use them for something. So to start with I needed to work out how to send them to an mosquitto MQTT server. MQTT is an IoT protocol designed to let devices publish and subscribe to data streams, fairly simply. The NodeMCU firmware I downloaded has basic MQTT support via a module I added, and using it is fairly simple.
First, I needed to connect the ESP8266 to my wireless network, using the wifi module. This is pretty simple:
wifi.setmode(wifi.STATION)
wifi.sta.config("myssid", "password")
To have this happen when the device starts up, you just need to put it in a
file called init.la. I found plenty of examples online, for example:
https://github.com/mrasband/huzzah_8266/blob/master/init.lua or
https://github.com/felixcameron/ESP8266-Lifx-switch-for-nodemcu/blob/master/init.lua.
Both of these have some form of retry logic to ensure the ESP8266 connects to
the wireless network, so I knew I’d eventually want to do something similar,
but to begin with, I just needed to connect, grab the current temperature and write it to my
MQTT broker.
To test, I connected to the device using screen and pasted in
the commands shown above. To confirm it worked, I ran
print(wifi.sta.status()), which returned 5, meaning it got an IP.
Now, on to sending data to my server. The MQTT module has plenty of example documentation, so starting off with something like this seemed sensible:
m = mqtt.Client(“esp8266_study”, 120, "", "")
m:connect("178.79.182.85", 1883, 0, function(client) print("connected") end)
m:publish(“/test”,”hello",0,0, function(client) print("sent") end )
This code just sends the message hello to the topic /test. To see if that’s the case, you can use something like this Ruby MQTT client gem, and its subscribe example:
require 'rubygems'
require 'mqtt'

MQTT::Client.connect(‘mqtt://mqtt_ip_address') do |c|
  # If you pass a block to the get method, then it will loop
  c.get('test') do |topic,message|
    puts "#{topic}: #{message}"
  end
end
Then to use temperatures instead, switch to using an actual topic, grab the temperature and send that instead of a test message. Something like this is more idiomatic:
m:publish("/sensors/study/temperature", temp, 0, 0)
and the Ruby client should showed:
/sensors/study/temperature: 20.3125
Putting it together
At this point I had all the components I needed to construct a working IoT thermometer:
- ESP8266 with a working NodeMCU firmware
- a connect TMP102 i2c thermometer
- code to read the thermometer
- code to connect to my wireless network
- an MQTT broker
- code to publish messages to an MQTT broker
So, it was time to put it together. This time, instead of typing everything in
by hand (or pasting it), I decided to write my own init.lua file, with plenty
of error checking and then upload it. This meant that when the device restarted it
would automatically run my script.
After a couple of hours of poking about, the script I came up with is:
It took a fair bit of debugging, as I’ve never written anything in Lua before.
A couple of pitfalls are that ~= mean !=, and the NodeMCU callbacks mean
that writing standard procedural scripts doesn’t really work.
One of the most useful tricks I found was having file.remove('init.lua’)
ready in the clipboard and screen open, as if you do things wrong the device
tends to reset and rerun the init script, resulting in an infinite reboot loop!
Quickly pasting that in can stop that happening, because the file will have
gone after the next reboot. Handy!
After uploading the working script using luatool, I found that it takes about three seconds to connect to the wireless network and get an IP, and that then it starts measuring the temperature and sending it to my MQTT broker. Cool! As I write this, the ruby client code is spitting out temperatures every few seconds.
Wrap up
Anyway, now I have this running I need to play about and work out what else to do with it! I’m thinking of adding a PowerSwitch Tail and using it as a thermostat, by subscribing to MQTT data, so watch this space!
I also mentioned the need for IoT security, so I’ll be looking into adding credentials to my MQTT broker as well as configuring SSL. This should mean all my temperature data is encrypted in transit, and that without authentication it won’t be possible to write evil temperature values to the broker. This could be particularly important if I use it as a remote thermostat!
Update: after about a year and a half I realised I had a typo in the hardware name! It’s ESP8266, not ESP2866. I’ve updated the post to reflect this!